Friday, November 22, 2019

2019 Ice Skating on Stella Lake

 We couldn't believe it, but it happened again. For the third year in a row, the Wheeler Peak Scenic Drive stayed open into November due to lack of snow. The temperatures got cold enough to freeze Stella Lake, which meant we could go ice skating! We were so excited!

The kids and I went up with my friend Jenny. We had to check the night before to see if the kids' ice skates still fit (they're the adjustable size kind), and fortunately they did.

The ice seemed kind of thin at the north end, so we headed to the cove on the east side. Our first year up here for ice skating, only this section was frozen, and the rest was open water.

Desert Girl did a fair bit of rollerblading this summer, so she put on the skates and was off.
 

Eventually we moved out on the bigger part of the lake and found the south end was good, although it made some weird noises. It was fun skating with Wheeler Peak in the background.

It was warm. So warm that Desert Boy decided to take his shirt off.

 Our friend Meg came and made it look easy!

Desert Girl and Jenny did some more artistic moves. 
 We had such a wonderful time that we knew we had to come back...to be continued...

Sunday, November 10, 2019

Late Fall Jaunt on the Serviceberry Trail, Great Basin National Park

I've run most of the trails in Great Basin National Park this summer to prepare for the Tushars Marathon, but I didn't make it to the Serviceberry Trail up Snake Creek. I decided to remedy that before I headed over for the Moab Trail Half-Marathon. (This has been a year of a lot of running for me!).

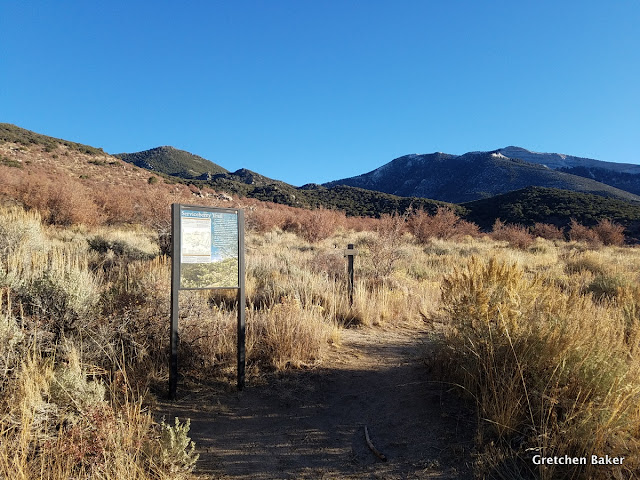
I wasn't surprised to find myself alone at the trailhead. The loop trail is approximately 3.2 miles, and you can see many of the eponymous shrubs right at the trailhead. This time of year they aren't too showy, with no green leaves, white blossoms, or dark berries.

I headed west (left) first, following along the creek for awhile, then climbing up towards the saddle. 

I love this big granite rock with the rock balancing on it. 

Fall colors happened so fast that I didn't get a chance to get up Snake Creek to enjoy the aspens this year. Upper Snake Creek has one of the best aspen groves in the park.


As I went over the saddle, I enjoyed the views.

 These aspens didn't have any leaves left on them, and the ones on the ground weren't particularly colorful.

I did find one small aspen on the backside with leaves! It felt like I won a treasure hunt.

This part of the trail is especially nice, with gentle ups and downs.

Sagebrush covers most of the lower hillside, transitioning to pinyon pine and Utah juniper up higher. In wetter drainages, we see aspen and white fir.

And over the trail is an arch of mountain mahogany.

Then it's time for lots of switchbacks down to the trailhead. The serviceberry is really abundant here. This is one of the easier trails in the park, but it does have a fair bit of elevation change. It's open anytime you can get up the road--eventually the road will be snow-covered in the winter. You usually have it to yourself, and it's quite peaceful and beautiful.
Here's a blog post about hiking the Serviceberry Trail with fall colors.

Friday, November 8, 2019

Small Party Assisted Rescue (SPAR) class in Nevada


I teach cave rescue courses for the National Cave Rescue Commission (NCRC), and one of my favorites is the Small Party Assisted Rescue class. The idea behind this class is that if someone in your caving group gets hurt or sick on the cave trip and doesn't need a litter carry out, your group gets the person out with the gear they have.

The class is often structured for three or four days. I've helped teach them in many states and even Canada over the past few years. Recently we held one in Baker, Nevada. After the morning in the classroom, we headed to our rope gym. Students were split up into small groups and rotated to several stations.

Traveling haul is a fantastic small party rescue technique, because you don't need any extra rope. With two small pulleys (you could use carabiners, but lose a lot of efficiency), you make a 2:1 haul system that moves up the rope. When you put the redirected rope into your Croll and sit down, you have great pulling force. Plus the patient can help (if not too injured).

Here's Dr. Tom waiting to get lifted up and over the table at the releasable redirect station. This is a fun technique that allows you to move someone not only vertically, but also a bit horizontally.

Tom was helping rig, but the main reason I had to include this photo is how often do you get to do ropework with a nearby disco ball??

The balcony provided a great place to practice convert to lower. The idea is that a patient (or a couple jugs of foam) are stuck on rope, and the rope is hard tied at the top. With some extra rope or webbing, how can you lower them quickly to the bottom? (Hint: Munter hitches are a great tool here)

Another station is the diminishing loop counterweight, where a rope goes through a pulley, and the rescuer is on one side and the patient on the other, and they are tethered together. As the rescuer climbs, the patient also goes up. You just have to figure out what to do when you get to the pulley! (That comes in day 2.)

The infamous Voodoo, a way to tension the rope. We used it for the guided rappel.

All this work made us hungry! A catered dinner from Salt & Sucre really hit the spot. Yum!

Then it was back to work with demonstrations and practice time.

Day 2 was all about the cliffs. I was so busy with teaching I hardly got any photos. Here's a multi-pitch way up the cliffs. Students learned how to rappel a patient through rebelays, as well as several other rescue techniques.

After another delicious catered dinner, it was time for a little whiteboard exercise of how to choose which method to use under which circumstances.

The final day was scenario day, where students go caving with instructors in small groups. Somehow an instructor in each group manages to have a problem, which must be solved. They all did great!

Thank you to all the instructors who came and shared their knowledge and to all the students willing to take time to learn something that may help them out some day.
Fantastic 2019 Nevada SPAR class
If you're interested in cave rescue, you can see upcoming classes at the NCRC website.
Hint: there's another cave rescue class (not as technical) coming up in Baker, NV soon, but only has a few spots left!

Thursday, October 24, 2019

White Pine Public Museum - Home of the Cave Bear


White Pine Public Museum in Ely is home of the cave bear. This cave bear is quite impressive, it's a short-faced cave bear, Arctodus simus.

A replica, based on a skeleton found in a cave in White Pine County, is on display in the museum. They recently redid its exhibit area, and the mural painted behind the bear is amazing. This huge bear skeleton is from the female. I learned recently at a lecture by paleontologist Blaine Schubert that only female short-faced cave bears have been found in caves, presumably because they were using them as dens. The much larger males have been found outside caves. Arctodus simus has been found all over North America. It went extinct about 11,000 years ago.

The White Pine Public Museum held a special event with Dennis Hone, one of the discoverers of the Short-faced cave bear from Labor of Love Cave. It was so interesting hearing from him about how the cave was found and what they did once they realized there were a lot of bones in it. I had the opportunity to go caving this past summer with the lead paleontologist, and he's still making cool discoveries in caves in eastern Nevada! Caves are such great time capsules, preserving all sorts of things for thousands and even millions of years.

With the new display, you can get up close and see just how big some of those bones are.

The museum celebrates the cave bear with t-shirts and glasses.

Afterwards there were lots of questions. 

And the kids measured themselves against a cave bear standing upright!

The White Pine Public Museum has lots of other cool exhibits, too, and is definitely worth a visit!
To learn more about Cave Bears, check out the wikipedia page, this National Geographic video, and this great page about cave paleontology.

Sunday, October 20, 2019

Homemade Concord Grape Jelly - New Recipe

Our friend Sharla let us come pick some of her concord grapes. One year we made grape juice from concord grapes, but I wanted to try to make some concord grape jelly. The problem was I couldn't find a satisfying recipe on the Internet. Many of them advised squeezing the grapes out of their skins. I tried that for about 14 grapes and decided that was not going to work. Then I thought of a brilliant plan. Why not just blend the grapes? We removed them from the stems and put them int he blender.

They look kind of gross right out of the blender (about 5 seconds was all that was needed). They didn't really smell like grape juice. So it was time to put them in a pot on the stove.

After about 10 minutes of simmering, the grape mixture smelled wonderful! Now it was time to get the pulp and seeds out.

Some recipes said putting it in a big cheesecloth overnight would work. But I didn't want to wait that long. So I put a couple big spoonfuls into my trusty sieve and pressed it through. I also tried borrowing a juicer to see if this whole process could be sped up, but the juicer got so little juice out of the grapes that I went back to this process.

Now I had nice, pure grape juice. To make the jelly, I just needed a couple ingredients. I used Ball Low-No Sugar Pectin and some sugar. Specifically, about 4 cups juice, 2 cups sugar (much less than most jelly recipes, which have more sugar than juice), and 3 Tablespoons pectin.

I realize now I didn't quite get photos of all the steps, I guess my hands were too busy! Bring juice and sugar to boil, then add pectin, stir constantly as it comes to a full boil again, then pour into prepared jars (I like to sanitize them in the dishwasher, so then they are hot and ready to go with minimal work).

After the jelly is in the jars, it's time to can it. This summer I purchased a steam canner, and I absolutely love it. It's so much faster and easier to clean up than a water bath canner. Even the kids made apricot jam using it earlier in the summer--I wouldn't have let them get close to the big water bath canner and all that boiling water.

The end result is some delicious jelly! Here are just a few of the jars.

Basic Recipe:

Grape Concord Jelly
Makes about 5 or 6 8-ounce jars.

Ingredients
About 1 colander (12 cups) of concord grapes
2 cups sugar
3 Tbsp. Ball no or low-sugar pectin

Instructions
1. Prepare canning jars, rings, lids. (I sanitize them in dishwasher and start it before I start making the jelly.)
2. Rinse grapes, then remove from stems.
3. Blend grapes for a few seconds in a blender.
4. Put grape mixture into medium pot on stove over medium heat for 10-15 minutes.
5. Strain grape mixture through sieve/chessecloth to get grape juice.
6. Put 4 cups grape juice and 2 cups sugar in pot on stove. Heat over medium heat.
7. When it comes to a roiling boil, add 3 Tablespoons Ball No-sugar/low sugar pectin. Stir for about a minute or so, until it comes to boil again.
8.  Ladle jelly into prepared jars (funnel recommended), leaving 1/4 room headspace. Apply lid and ring.
9. Can according to instructions. (For steam canner, I put water in bottom, put jars on metal riser, put on lid and then turn on. When the indicator on the top gets into the green zone, I set the timer for 20 minutes based on our elevation. When the time is done, I take the lid off and let everything cool.)
10. Enjoy!
Related Posts Plugin for WordPress, Blogger...

blogger templates